Thursday, December 17, 2009

Feedback with a photo


It is nice to get feedback on some of the recipes I post. Today I got one from a reader and this time they sent a photo.
The reason I am posting it, is because the photo and the end result seems better than mine!
Bravo!
There is nothing better to see that someone has taken the recipe and put their signature on it!
That is what cooking is all about!

Here are his comments:

Great recipe! We had left over cornish game hens which was enough to make six enchiladas; we each ate three.
Chili sauce was great and easy to do. I reduced all by 1/4 to match quantity of meat and I used the last 5 minutes on broil to get the cheese browned a little.
Recipe is a keeper.. Great with margaritas and Pacifico.

Sunday, December 13, 2009

Chicken Enchiladas with Chili Sauce


I usually do not like dishes with gobs of sauce because first they are high in calories and second they can sometimes mask the flavors in the main ingredient. Therefore most of the time I will simply make a vinaigrette type or stock reduction with some other ingredients tossed in for effect.
But not this time, I had a hankering for some enchiladas swimming in a nice tasty thick sauce.
This recipe is pretty simple , basic Bechamel sauce shredded chicken and cheese, bake let cool and eat.

Béchamel is one of your basic sauces to which you add lots of things to , so if you do not know how to make it, here it is. ( I think I am repeating myself in a previous listing ) 6- 8 oz of unsalted butter 2 cups chicken stock 2 cups whole milk 1/2 cup all purpose flour Take the butter toss it into a 4 qt pan, melt it, when melted stir in the flour until totally coated. In another pan heat milk and stock until almost boiling. When ready ladle in the liquid while whisking it in, until all is accepted. Stir more to be sure there are no clumps or lumps. ( I just had to say that, kina ryhmes) Once all incorporated, let thicken and reduce flame to low simmer and let it bubble away for a few minutes. Be sure you stir it now and then to keep it from burning. After 5 minutes remove from heat and set aside.


Now depending on the flavor you like the best, chili wise, roast up a couple. I used the Poblano Chili and roast on the open flame of the eye of the stove. Turn to roast evenly

After the chili is totally blistered ( about 5 minutes ) remove from heat, put in a paper bag and seal, wait about 10 minutes, it will steam in the bag. ( Good thing )

Remove from bag, remove with your fingers the charred skin, cut it open in half, remove the seed and the top of the pepper.

If you do not have to run it under water so much the better, but if you wish and need to , rinse with a little water as possible ( Flavor goes with some of the water ) then slice into strips.
( This is what is called Ristras )
Toss into a blender, take about half of the Bechamel and put it in the blender. Now, you can do one of two things here.
Keep going or add another flavor.
For this recipe I added Spinach. I have also used Watercress (Berro) Wilted Chard, Sauteed Leek Whites, If you want corn flavor you could add a corn, etc....You get the idea?
I added a large handful of washed Spinach, into the blender and blend away for about 2 or 3 minutes until it is all blended up!
Return to the Bechamel pot, stir, and season.
Ok, what do you mean season?
You are the one who is going to eat this, so how would you like it?
I would put in about a teaspoon of Kosher Salt. About a half teaspoon of red pepper flakes, or maybe some Cayenne.
If you don't want it too salty, omit the salt, keep the pepper,
If you don't like it to spicy, omit the pepper, keep the salt.
Got It?

Ok,

Take the chicken and be sure it is shredded, ( stringy) This is great for chicken leftovers. Or if you are doing this without chicken a Deli Rotisserie Chicken is perfect.
Discard about half the skin ( unless you like fattening delicious skin)
Put into a bowl and add about one cup of the Green Sauce.
Mix to cover well.
Take a 9x12 ovenproof dish. Take about a cup or so, to cover the bottom of the pan with the Green Sauce.
Take and warm some corn tortillas, in a oven so they are pliable, or if you have fresh tortillas direct from a tortillaria, this is when I usually make this so it eliminates the warming step.
Take the open tortilla, spread about 1/4 cup of the chicken mixture and roll up the tortilla and place the seam end down on to the bed of delicious green chili sauce.
After you have roll up about a dozen of these big cigars, you should be finished with the chicken. If not, make yourself a chicken taco.
Put the rest of the sauce on top of the formation of rolls, spread the sauce to be sure it covers all of them.
Now, if you like, this is optional, take about a 1/2 to 1 cup of cheese and top all along the top with cheese, slam it into a 375 degree oven for about 20 minutes or until the sauce is bubbling or the cheese is totally melted and starting to brown.
Remove , wait until you can eat it without burning your mouth.
Enjoy.


Stuff you will need:

2 or 3 Poblano Chilis ( Chili Negro in some areas, Pasillo in the states )
1 Cup packed greens ( Spinach, Watercress, Cilantro )
2 cups chicken stock
2 cups whole milk
6 oz butter
1/2 cup flour
Salt and Pepper
4 cups shredded chicken, or one whole small, Pollio Rostizado)
12 corn tortillas
4 garlic cloves smashed and sauteed in the butter.
Hand full of shredded cheese, like Asadero or Chihuahua, or Monterrey Jack.
Cilantro and Green Onion for garnish.


Thursday, November 26, 2009

Turkey leftovers , one more idea...


Turkey Vegetable Soup with Cornmeal Dumplings


I usually will make a nice savory soup, with bits of turkey, rice, celery and maybe even the stuffing in a nice chicken stock, but.....here is a nice variation of what to do with some leftover turkey.

If you like a spicier broth, stir in a little sauce from a can of chipotle chile en adobo (chipotle chiles in sauce)


To start by

preheating broiler. On a foil-lined baking sheet, broil the tomato and poblano chile until blackened and blistered all over and softened.

Let cool. Meanwhile have a glass of wine or a shot of your favorite libation. 10 minutes while the chili and tomato blackens....

Then,peel, core and seed the tomato, then puree in a blender. Peel and seed the chile, then dice.

Heat the oil in a large pot over moderate heat.

Add the onion and saute until soft, about 10 minutes. Add the garlic and saute briefly to release it's overpowering smell of a Italian restaurant.

Add the oregano, crumbling it between your fingers, then add the tomato. Saute, stirring, for about 5 minutes to develop the flavor.

Add the carrots and the broth. Bring to a simmer.

Simmer gently 5 minutes, then add the zucchini, chard, poblano chile and turkey. Remove from the heat while you prepare the dumplings.


For the dumplings:

In a bowl, stir together the cornmeal, flour, baking powder, salt and baking soda. In another bowl, whisk the buttermilk, butter and egg to blend. Add the dry ingredients to the liquid ingredients and stir just enough to moisten all the dry ingredients.

Return the soup to moderate heat and bring just to a simmer. Season with salt and pepper. Drop spoonfuls of batter about the size of a walnut onto the soup's barely simmering surface, spacing the dumplings evenly and leaving room for them to double in size. You should have enough batter to make at least 12 dumplings. Depending on the diameter of your pot, you may run out of space before you run out of batter. Cover and adjust heat to maintain a bare simmer; you do not want the soup to boil. Cook 20 minutes. Divide broth and dumplings among warm soup bowls.


Stuff you will need


1 large ripe tomato
1 large poblano chile
2 tablespoons vegetable oil
1 small yellow onion, chopped
1 large clove garlic, minced
1 1/2 teaspoons dried Mexican oregano
2 carrots, diced
2 1/2 quarts Day-After-Thanksgiving Turkey Stock (see recipe above)
2 small zucchini, diced
3 large chard leaves, ribs removed, in 1/2-inch ribbons
2 cups shredded cooked turkey


Cornmeal Dumplings:
1/2 cup yellow cornmeal
1/2 cup all-purpose flour
1 teaspoon baking powder
1/2 teaspoon kosher salt
3/8teaspoon baking soda
1/2 cup buttermilk or yogurt you could also use crema

2 tablespoons melted unsalted butter
1 large egg
Sea salt and freshly ground black pepper

This makes about 4 healthy, hefty servings or about 6 normal servings


Enjoy!


Saturday, November 21, 2009

Pumpkin Ice Cream

Thanksgiving is one of my most memorable holidays, because it was a way that my grandmother and mother would spend all day and usually the day before cooking and getting the house ready for family and friends to come over.

I miss the hustle and bustle of the holiday, since now the family is gone, and usually we will wind up going to friends for the dinner.

I do a Russian Easter dinner sometimes, but usually it has dwindled down from family and friends to a few close friends.
Gone are the wild and crazy days of a Russian table of 20 or so, to now maybe 6 or so Russkies.
Gone are are days of tipsy Russians, notice I say "tipsy" Not drunk.
That is being politically correct.

Anyway, during the holidays I usually will make a least one of not two Pumpkin items. The last few years I have made pumpkin cheesecakes, with gingerbread crust. This year I figured in doing some ice cream.
In the plaza in Patzcuaro have some of the better home made ice cream makers, so why do all the rigmarole of making home made?
Because they don't have PUMPKIN, thats why.

So here it is.
Pumpkin Ice Cream
( Makes about 1 quart)
Adapted from The Craft of Baking by Karen DeMasco & Mindy Fox

If using canned pumpkin, make sure to find one that's 100% pumpkin. Often you'll find cans of pumpkin pie mix. That has spices and sugar and crap you don't want. You want your own spices and crap! So open the can and press the mixture through a fine mesh strainer before freezing, as directed.

Pumpkin can be slightly grainy and straining the custard is a good idea to help smooth it out.


Stuff you will need:


1 1/2 cups (375 ml) whole milk
1 cup (250 ml) heavy cream
1/3 cup plus 2 tablespoons (95 g) granulated sugar
1 teaspoon freshly-grated ginger
1/2 teaspoon ground cinnamon
1 cinnamon stick
1/2 teaspoon freshly-ground nutmeg
1/4 teaspoon kosher salt
5 large egg yolks
1/4 cup packed (60 g) dark brown sugar
1/2 teaspoon vanilla extract
optional: 2 teaspoons Grand Marnier, rum or brandy

3/4 cup (180 g) canned pumpkin puree (100% pure), or homemade


1. Make an ice bath by putting some ice and a little water in a large bowl and nest a smaller metal bowl (one that will hold at least 2 quarts, inside it. Set a mesh strainer over the top.

2. In a medium saucepan mix the milk, cream, granulated sugar, ginger, ground cinnamon, cinnamon stick, nutmeg, and salt.

3. Warm the mixture until hot and the edges begin to bubble and foam.

4. Whisk the egg yolks in a separate bowl and gradually whisk in about half of the warm spiced milk mixture, stirring constantly.

5. Scrape the warmed yolks back in to the saucepan and cook over low heat, stirring constantly and scraping the bottom with a heatproof spatula, until the mixture thickens and coats the spatula. If using an instant-read thermometer, it should read between 160º-170ºF (71º-76ºC).

6. Immediately pour the mixture through the strainer into the bowl nested in the ice bath. Mix in the brown sugar, then stir until cool, then chill thoroughly, preferably overnight.

7. Whisk in the vanilla, liquor (if using), and pumpkin puree. Press the mixture through a fine-mesh strainer, then freeze in your ice cream maker according to the manufacturer's instructions.

Variations: Stir in 1 to 1 1/2 cups (250 - 320 g) white or milk chocolate chips, crushed caramel, chopped up Skor or Daim (toffee) bars, or chopped toasted pecans or walnuts. A bit of chopped candied ginger would be nice, too.


Leftover bits of crumbled gingersnaps or gingerbread, or even toasted bits of brown bread or gingerbread could also be folded in, or crumbled on top for serving, which was suggested in the book.

It will usually take about 20 minutes in my machine, which will then require putting in your normal house freezer to get it down to "freezing"

The ingredients are not vital, unlike baking, it is hard to screw up!
After you do it a couple of times, you will try to make ice cream out of lots of stuff.
I have made Chai, Green Tea, Ibarra Chocolate, to name a few.

Enjoy!


I had a couple of emails asking what kind of a ice cream machine I used. The one I use is made by Kitchen Aid, but unfortunately is no longer made by them. Any ice cream machine will work, just remember to finish off the freezing in the freezer. You may be able to find a used on , on Ebay or other used appliance site.

Tuesday, October 20, 2009

Huitlacoche pick of the season, NOW!

The last couple of days during my wanderings at the mercado, I have seen the most abundant crop of Huitlacoche that I have ever seen in my years of bumbling around the mercado.

Last year I took some guests to peruse the market and there was only a few ears displayed by the Indian ladies.

Today I would guess that about 75 % of the private vendors had great assortments of the fungus.

When people look at it, the first reaction is eeeechh.

Funny they don't do that when looking at a Portabello or Oyster Mushrooms, so why the disdain?
Well maybe because they haven't tasted it.

What I usually do is make a sauce or dish with the FUNGUS and not tell them what it looks like, only after I will bring out a ear with it on.

Varied response.

Don't do that unless you know the people real well or are willing to loose a friend or two.

I usually will ask beforehand if the people that are going to feast on this delight, enjoy truffles.
If they say yes, then it's a no brainer. If they say no, then I ask them if they like mushrooms.

So far, I have only had one meltdown. Same person didn't like Stake Tartare, and Escargots.......

This is a easy recipe for a great filling. I usually will make it as an appetizer and make a nice corn or cream sauce depending on what flavors I want to feature.

To make the filling.
Add 3 or 4 tablespoons olive oil to a medium size skillet over medium heat.
Toss in the onions and sweat until translucent. Add the garlic.
Add the chopped huitlacoche, combine and add the crema or ricotta cheese.
Let simmer for about 5 minutes season with salt and pepper.
Set aside.


Stuff you will need.

3 -4 TBS olive oil
1/2 cup chopped white onion
2 cloves garlic, smashed and minced.
1 1/2 cup of chopped Huitlacoche.
(canned is available if need be)
2 TBS finely chopped epazote, (leaves only)
pinch of thyme
1/4 to 1/3 cup of Mexican Crema

For the Crepes

4 eggs
3 cups milk
420 grams of flour
1 small stick of butter
1/8 teaspoon of salt
1/2 teaspoon honey

Combine the above ingredients, (reserve 1/3 of the butter for the skillet) in a blender and whirl away for about 1 minute. Let rest for about 15 minutes.
Meanwhile back at the stove, get your best non stick 10 inch skillet
Take a small ladle full and spead on the hot skillet, turn the skillet so that the batter evenly coats, Put back on burner and wait about a minute or until the edges start crisping up or browning.
With a silicon spatula, or if you are a seasoned cook, you fingers, you quicly flip it and let it finish cooking on the other side, usually about 45 seconds.
Hold the crepes in a warm oven until all are done,
When ready fill with the filling, top with sauce and enjoy!

Saturday, October 17, 2009

Pavo Con Pulque


My first experience with Pulque was about 10 years ago, driving between Guadalajara and Morelia. At one of the Autopista toll stations we would get inundated with several roadside vendors running along side the car with some kind of wicker bottle of "stuff".
One time we pulled over to use the restroom or to take the dogs for a walk and this guy came over to sell me some Pulque.

What the hell is Pulque?

It is an juice from the Maguey plant that is combine with some fruits and left to ferment. It has a very noticeable pungent ( nice word for it ) odor or smell......

Depending on which fruit is used, commonly pineapple, strawberries and prickly pears are used with the slimy sap from the plant, then left to ferment and sugars are added and your have
Pulque!

Cooking with Pulque is more like marinading with a wine or combine sauce where you use an alcohol liquor.

There are lot of stuff that you can cook with, this recipe uses Duck, but you could substitute the old other plain bird the chicken, for Pulque con Pollo.

The trick to this dish is the sauce, so the duck has the delicate taste and texture, but the sauce give it the extra flavor and is a little time consuming but worth the effort!

The Pulque adds a distinct and delicate nuance to the dish. Try it you may like it!

Pulque is a concoction that goes back to pre Columbian times and can be compared to moonshine or other home made booze.

To start:
Take the whole duck and place breast down in a baking dish. Season with Salt and Pepper, cover with pork lard, garlic and onions, the bay leaves and some of the thyme. Add water to cover the duck and put into a 350 F oven and cover with foil.

After about one hour, remove the foil and turn the duck over so that the other side gets exposed.
Cover with foil and return to the oven for one more hour. During the last 15 minutes remove the foil.

After 2 hours, remove and let cool, discard the water and fat, I usually will put it in another pot and stick it in the refrigerator so it solidifies, which make the disposal easier.

Carefully remove the bones with leaving the meat intact. Set aside.

Now make a Roux. Melt the butter in a 4 qt saucepan, and flour and stir incorporating the flour, on medium heat, be sure and keep stirring so the flour will not burn, when a light brown add some caldo de pollo about one teaspoon, incorporate and set aside.
To assemble the sauce

Take half of the duck bones and cover with water, bring to a boil in a sauce pan. Add the celery and carrot along with the onions, cook for about 30 minutes on medium. This will make a nice broth.

Take the remaining bones, vegetables and the cut tomato and place into a regular pan, do not use a non stick pan since the items will not caramelize properly. Place into a hot oven, until well browned but not burned 450-500 degrees.The will stick to the pan and form a fond. Remove from the oven, put on medium flame, add the Pulque and scrape the bits from the pan and squeeze the vegetables, to emit their juices. Reduce by half.

Add the broth and strain. Then add the liquid to the roux, to combine. Heat, season to taste, and cover the duck on individual servings with the sauce.

You can serve this with white rice, so that it will absorb the sauce.


Stuff you will need:

One large or two small ducks
1/2 lb lard
one onion cut into 8 pieces
1 head of garlic cut into half.
4 bay leaves
2 sprigs of thyme

For the Roux
1 1/2 oz butter
1 1/2 oz flour
1 teaspoon salt
1 teaspoon chicken dry caldo

For the sauce
1/2 leek in pieces, washed and cleaned
2 stalk of celery chopped
1 carrot diced
1 large onion chopped
1 large tomato chopped

Thursday, October 15, 2009

Quick and easy Talapia with tomatoes

We have a few "fresh" seafood places in Patzcuaro, one is on the Periferico and it sells both fresh and frozen shrimp and fish. They also have frozen Talapia which is a pretty common cheap fish in Mexico.
This recipe uses everything that is easy found locally and pretty much everywhere.

To start,
Add olive oil to a pan , heat to medium heat, and toss in the onions and fennel, stir on heat for about 6 or 7 minutes until the onions are translucent.
Stir in tomatoes, garbanzos, grated lemon, olives, cumin,turmeric, paprika, salt and pepper.
Bring to a simmer, lay the talapia fillets over the vegetables, cover and let cook for about 10 minutes, half way through carefully turn the fish over once.
I usually make a couscous or pasta like orzo to use with this dish. You could even use rice.


Stuff you will need:

1TBS Olive Oil
1/2 of a medium white onions chopped fine.
1 head fennel, without stalks. sliced thin.
1 14 oz of stewed tomatoes
1 15 oz can of garbanzo beans, or you could use fresh
1 1/2 Tbs freshly ground lemon zest.
1/2 cup pitted black olives, chopped.
1 1/2 teaspoon ground cumino
1/2 teaspoon turmeric
1/2 teaspoon paprika
1 teaspoon Kosher salt, if using regular table salt, reduce by 40%
1/2 teaspoon fresh ground black pepper
4 tbs fresh chopped parsley (Italian preferable)
Couscous, Orzo or Rice.

Friday, October 9, 2009

Beef Tongue or Easy Lengua


When you first mention beef tongue, lots of people's response is oooooh yuk!

It is probably safe to say that those people have never had a really good taco made from lengua!

Why is it so disgusting for so many people?
The taste that it has, is really good. Besides being my favorite taco choice, I will make it about 5 or 6 times a year to use for tacos or thinly sliced on a nice bagel or bun, some slivered red onion a little mayo, yuuum!

Here is a simple way to make it!

Buy a nice sized tongue that will fit into your pot.

Make a brine of Kosher salt and water. 1 CUP Kosher salt to 2 quarts of water. Soak for about 3 hours. Drain and remove, meanwhile,

Bring your pot to a low boil, add the onion, garlic and salt and spices.

Place the tongue in the water, and return to a low boil. During the next 2 hours go ahead and skim off any foam that may rise to the top.

After about 2 hours, keep at a low simmer. Be sure the meat is covered with water at all times.

Halfway through you can also turn the meat so the previously expose top is now in the bottom.
After 3 hours, remove the tongue.

At this point you can either make it for use as slicing meat or continue for making it in a sauce.

Once the tongue is cool enough to handle, take a sharp knife and remove the skin from the meat.

If you take your time you will not remove too much of the tender meat underneath the outer skin.

Once done, clean up the end, usually you will just cut about 1/2 inch and it will expose the non fat tender meat. Slice thinly and enjoy.

( some people prefer to strip off the skin, you will have to use pliers in order to grab it, I find just trimming it off much easier)

To make the sauce.

Either degrease the broth, remove the onions and stuff strain. I will usually remove all the large stuff floating in the pot with a spider, and put the pot in the fridge. The next day I can remove the fat with a fork or spatula.
Take the broth and reserve about 4 cups, place into a sauce pan, in the pan add 3 or 4 cloves of garlic, one small onion, 1 TBS vinegar, and a slice of day old bread. Cook for about 15 minutes until reduced about 1/2, process with a stick blender or in your blender, season the sauce with salt and pepper (salt if needed)

The broth is now degreased, take the tongue and cut into 1/4 inch slices. Place into a baking dish and overlap the tongue meat in the pan, take the broth and pour in on top of the meat, place into a hot oven 350 or so, for about a half hour.

To serve, place on plate or shallow bowl, top with chopped cilantro and chopped white onions.
A dash of your favorite hot sauce is also nice.

Enjoy.

Stuff you will need:

One Beef Tongue 2.5 to 3 lbs.
1 large white onion quartered
1 carrot cut into 1/2 inch rounds
3 Bay leaves
1 TBS peppercorns
1 1/2 cup Kosher Salt

Thursday, October 8, 2009

Oatmeal Raisin Cooking Day

It's currently 64 and a light rain is attacking the tile outside. Perfect weather for some cookies....No?
Here is a simple but tasty recipe for Oatmeal cookies. This recipe was one that I got while at the California Culinary Academy in San Francisco about 20 years ago. I am sure that there are tons of recipes, this one always was good and people seemed to enjoy the end result. (at least that what they said)

Using more oatmeal than normal it brings a more chewy texture and nut like flavor.
Oven to 375,

Then while it is heating up, in a Kitchenaid or similar mixer toss in the ingredients first starting with the butter, then brown sugar. Since this recipe has come out I have substituted Splenda* Brown sugar mix, this allows me to have an extra cookie or two without overdoing my diet.....

Process until well blended, add the eggs one at a time, then the vanilla and incorporate all.
Sloooooowly add the flour mixture, then the oats and raisins. Add the cinnamon and allspice and process for another minute.

On baking sheets, place some parchment paper or just butter or grease the sheets. Again I prefer parchment paper, saves on the calories.....

Drop by the tablespoon, or if the dough is a tad heavier I usually flour my hands, use a wooden spoon to grab a glop of dough and roll it like a meatball in my hands and then place it on the sheet. This allows for more even cookie flow, and you always want even cookie flow......it's a Zen thing!

Bake for about 12 to 15 minutes depending on your oven and rack placement. You want them just lightly browned.

Cool on wire racks. eat one, save the rest or give them away so you don't eat all of them the same day!

Enjoy.

Stuff that you will knead......


1 1/2 cup flour
1 teaspoon baking soda
1/2 teaspoon ground cinnamon
1/4 teaspoon salt
1/4 teaspoon ground cloves
1/4 teaspoon ground allspice
3/4 cup butter, softened
1 1/2 cup firmly packed brown sugar*
2 eggs
1 teaspoon vanilla extract (Get the real stuff not imitation!)
2 Cups quick cooking rolled oats
1 Cup raisins (Be sure and break them apart so they are not big clusters of raisins)

Makes about 3 dozen 2 1/2 inch cookies or 18 3 inch ones......


Enjoy

Monday, August 3, 2009

Gotta have my Dills


Dill pickles that you buy at the store are awful. Most of them have oodles of vinegar and taste unnatural.

Solution........... Make you own

Start with growing picking cucumbers, they grow real well especially in grow boxes. I have about 5 plants, and can get a batch within 4 or 5 days enough to make them. If I have too many I make a batch and give them away to people that have the hankering for sour pickles.

Here is what to do.

Get some small to medium cucumbers, scrub and wash real good in clear water. Pour in 1 gallon of water into a stock pot add a 3/4 cup of Kosher salt, heat until dissolved.
Let cool completely, while water is cooling take skins of garlic cloves or smash with wide chefs knife until skins fall off.
Pack the cucumbers tightly into wide mouth jar, add garlic and spices, distribute the spices evenly through out the jar, pour on the cool salted water and be sure all the pickles are covered with at least a half inch of head room.
Leave in cool place for at least 3 to 4 days, you can skim off the foam daily. After 3 or 4 days you can then place them in the refrigerator and enjoy.
I like mine with lots of garlic, so you can adjust it for your preference. They will last in the refrigerator for about 2 months. ( But they never last that long)


Stuff you will need.

20-25 small cucumbers ( choose only firm, fresh, unwaxed) better grow your own!
3/4 cup Kosher Salt
15 whole garlic cloves unpeeled
1 Bunch of fresh dill
2 teaspoons mustard seeds
1 1/2 teaspoons whole black pepper
1 teaspoon coriander seeds
6 Bay leaves
1 or 2 hot dried small peppers
1 gallon of water.


The end result

Monday, July 13, 2009

Zukes that's good!

This is a spin an old Russian recipe which was called "Poor Man's Caviar" It is usually done with eggplants, onions and tomatoes.

Well when you have tons of zucchini, squash, eggplant, onions you can only do so much zucchini bread and sauteed vegetables.

So when you want to use up a dozen or so squashes give this one a try.

This one, used up about half dozen crookneck squashes, 3 green zucchinis, 4 Japanese eggplants and about a half a dozen doorknob squashes, I don't remember the real name for them (maybe, pan squash) but they look like doorknobs anyway.

Wash and cut the squashes, dice into 1/2 inch cubes, if round squash, slice into 1/4 inch rounds.

Chop onion into same size pieces.

Heat up 2 TBS of olive oil in large skillet, toss in onion and cook until soft, ( 5 minutes )
add all the zucchinis etc.
Add ketchup,
Add salt and pepper, stir to cover all the cut veggie's with the ketchup.
Cook over medium to low heat for about 1 hour, then take the lid off, check to see that the pieces are soft. Stir with the cover off until some of the liquid is evaporated. Taste and season.
Remove from heat, cool, and that's it!

It is good both hot, room temperature and cold!


Stuff you will need.
1- 1 1/2 cup ketchup
12-16 cups of chopped squashes
1 large yellow onion chopped.
2 tomatoes chopped.
3 to 4 cloves of garlic minced or crushed.
Salt and Pepper

Sunday, July 12, 2009

Sourdough Starter

Starter is simply a growth of the yeast culture which develops first with just plain old bread yeast but it develops it's own unique taste because of the bacteria in the air and water in your own locale.
That is why the sourdough in San Francisco has a unique taste as opposed to a sourdough from Poughkeepsie.

The starter will give you the flavor not necessarily the rise, so for example on the bread recipe before where you let it sit for 18 hours, you would add lets say one cup of the starter to the beginning mix anyway, for the flavor not for really anything else. Ok, a little rise but not much.

You can take out one cup of the dough that has bubbled for 18 hours, that essentially is a starter. It went through all the work to grow and mature, or you can make some starter by scratch to use as starter and not part of the bread reciepe.
Here is a way to make starter, which you could use into the bread reciepe as part of the mix to bring to the table the flavor which keeps on devopoing.

Keep in mind that when you replenish the starter with the milk and flour, use the same kind as before to keep it consistant and not inroduce something you will not be able to recreate.

1 package of active yeast (1/4oz or 7 grams)
1 cup warm (105 -115) water
1 cup warm (105 - 115) non fat milk
2 cups flour

Sprinkle the yeast over water in a bowl, stir until mixed, then mix in the warm milk.
Add the flour, mix to blend, the beat with spoon until smooth.
Transfer the mixture to a 2 quart glass, enamel or stainless steel container. Cover tightly and let stand at room temperatrue (75 to 85) until mixture smells sour. (Usually 24 to 48 hours). Stir it down frquently, it is now active and will be bubbly.
This is starter.

To use it, you stir it down again and remove one cup, add the cup to your bread reciepe. You now need to replenish what you took out. For example if you used 1 cup of hte starer in a reciepe, blend in 1 cup of flour and warm milk, Cover the starter and let it stand in a warm place for several hours or overnight until it is active and bubbly again.
Between uses, refirgerate the starter in a tightly covered container. Always bring the starter to room temperature beore usin git again. Leaving it out overnight before you will need it for baking is usually the easiest.
If you use your starter regualrly, at least ever 10 to 15 days, it should last indefinitely. Some sourdough starters are passed on from one generation of a family to another. I worked in a restaurnat that had a bubbling 5 gallon eartheware crock that was the starter for all the breads they made. It was the job of the new guy to feed it all the time, interesting task to say the least.

I hope that sort of answers the starter question, you will get a hang of it, it's not hard once you figure it out and start using it.
Have fun!

Sunday, June 28, 2009

Simple Sourdough Bread, Real Simple perfect for me!

I would have loved to have had the opportunity to be a intern at some bakery.
There are nuances and feel of the dough an pastry that I just would have enjoyed getting the experience on. My whole education of baking was about 4 days, between portion control and special dietary requirements and allergic reactions....

You can feel the correct elasticity of the dough, you can see that it has risen sufficiently to put in the oven.

You know how to roll out the dough just right, or you know and are not afraid to tackle stretching dough in order to make strudel......

Over the years I have been somewhat successful at making bread, but I do not have the patience to make it turn out to be consistent, time over time over time.
Until I found this one recipe.

This is so simple that it would really take somebody real special to screw it up. But it did take me two times to get it right....or shall I say to get it perfect!

There are only 3 ingredients, not counting water...how simple can you get?
And you don't have to kneed it or process it in any way!

Stuff you will need.......get it? Knead!......

17 oz of bread flour
2 1/2 teaspoons of Kosher Salt
1/4 teaspoon of active dry yeast
3 - 4 tablespoons cornmeal ( optional )
12 oz water.


Get a big bowl and toss in 17 oz of flour. By weight.
add the salt and yeast, and mix to homogenize
add the water and stir into a dough.

If need be you can add just a tad, like a teaspoon or two of water if you need to incorporate all the flour into one mass. This may or not be required depending on your moisture content of your flour. Humid climates may require less water. The whole result should be a dough ball, just wet enough to have picked up all the dry flour. If you still have some flour in the bowl with the 12 oz of water, just a tiny bit, to pick it all up. The other way to accomplish the same, is to hold back a little of the flour and add it at the end. It is quite easy and don't be intimidated by it! The end result is worth it!

After you have made a ball and there is no more dry flour to be absorbed, remove the mixing spoon and cover the bowl with some plastic wrap.
Set aside in a draft free or semi warm place. Room temperature ( 70-95 )
Wait
Wait
Wait
Wait
after 18 hours, yep 18 hours, remove the plastic and flour your hands and punch down the down, flour the dough as you are punching it down , using the flour will allow your hands not to become too sticky, and let it rest for about 15 to 20 minutes.


After you come back, flour your hands remove the dough from the bowl and fold it down on itself folding the seam to be on the bottom , sort of making a nice dough ball while squeezing any trapped air, sort of massaging the dough ball, if it is sticky add a little more flour.

Meanwhile find a kitchen tea towel and lay it out on a flat surface and dust it with half the corn meal, place the dough ball on the middle of the dusted towel, the dust the top of the bread with a little more, fold the towel over on top gently as not to totally trap the soon to expand dough. Set it back into the old bowl with the towel wrapped around it.

Set it in a warm place, room temp. for about 2 hours, or until the dough has doubled in size.
One hour into the waiting process fire up your oven to 425.

Get a sheet pan or if you have a baking stone even better, and put some parchment paper on the sheet pan, sprinkle some corn meal on the stone.

When the dough has doubled in size, remove it from the resting bowl, you will now have the bread in sort of a towel sling. Gently roll it out of the towel onto the sheet pan or stone.
Wait for about 45 to 60 minutes until the crust has become dark golden brown and if you thump the loaf it sounds hollow.

Cook in the oven until your desired doneness.

I like mine about an hour long.

Remove , let cool on a raised wire rack for 20 minutes.
Turn the oven off.

Get some room temperature butter,
slice, butter and enjoy.....


The hardest thing about this recipe is figuring out the time you need to start it so you have the finished product at your desired time......

Enjoy!

Also, I might add. This has worked at both 8500 ft and sea level. It takes a little less time to do the 2nd rise at higher elevation. But still a no brainer!

Note: The picture of the dough in the bowl, is how it will look after 18 hours of fermenting.
Also be sure the water does not have any chlorine in it, with the small amount of yeast being used, it will kill the yeast! ( use non-chlorinated or spring water, bottled or distilled water)

Monday, June 22, 2009

Roasted Rack of Lamb, with basil mustard crust

I love lamb and although a little bit hard to ferret out sometimes , the Morelia Costco has it from time to time.
Never when we have someone invited for dinner, seems like always a couple of weeks later.
I hate twice frozen anything, being spoiled having fresh lamb a lot.This is a very common recipe, but for you who would like another one, and may not have it here it is.
You can add or subtract your own particular favorite spices and herbs
This one I load up with basil and garlic, you could substitute rosemary and thyme for it or add it in.... it is pretty foolproof, especially if you have a instant read thermometer or a remote probe one, otherwise you can tell when there is some juice sizzling in the pan or the meat has folded back a tad.
Once you cook this a few times you will be able to know it is ready by touching and felling the spring back of the meat.

Preheat your oven to 450

One thing to cooking or roasting anything is to be sure it is room temperature before tossing it into your oven. If it is something from your fridge, it is usually around 40 degrees (or at least it better be), when you put it in a hot oven it will not cook correctly no matter what you do, so always let the product come up to room temperature. Don't let it sit there all day, but you don't want to have it too cold.

Wash and dry the rack, If it is already Frenched, then take a knife and slit the membrane on the back between the bones or if you are real handy remove it completely. This lets the herbs and spices flavor the meat better.
Take some two day old bread, toss into the food processor along with a hand full or two of fresh basil leaves and 5 or 6 cloves of garlic, unpeeled.,Put in the salt , pepper and any other seasonings at this point.

Pulse the food processor until the bread crumbs are the consistency you corn meal or something manageable for you.

Coat the rack with your favorite mustard, NOT plain yellow mustard, use some stone ground Dijon or spicy mustard something with a flavor. You don't want the lamb to have the flavor of a ball park hot dog do you?

Ok, maybe you do, but DON'T

After you have put a nice even coating of the mustard sprinkle the bread mixture on the bottom and gently form the bread , pushing as you go until the whole thing is covered in the bread mixture.

Take a little olive oil and lightly sprinkle it on the top so it will brown even better. Put the meat in or on a Pyrex dish or oven proof dish of some sort.

Gently slide it into your hot oven.

Reward yourself with a nice drink.

For rare you will want to look at it somewhere abouts 15 to 17 minutes, Medium rare 18 to 25 minutes, medium 25 to 30 minutes.
Or jab a instant read thermometer into a center portion about half way in. For medium rare you want to see about 135.
Pull it out, tent with some aluminium foil and let rest for at least 8 minutes.
Cut, into servings and enjoy


Stuff you will need:

One 7 or 8 bone rack of lamb.
3 -4 TBS mustard
1 tsp Kosher Salt
1/3 tsp onion power
1 hand full of basil leaves
6 cloves of garlic, skin removed
1/2 tsp coarse ground salt
1-2 TBS olive oil
450 degree oven
plates, knifes, appetite

Thursday, June 11, 2009

Short Ribs Braised with Chile

One of my favorites easy, make and forget dish that is easy and makes for great warm up left overs and freezes well is Short Ribs.
The flavor actually gets better a day or two after the initial cooking. This recipe can be modified if you like to make the dish more astringent, simply add some apple cider vinegar and a little more sugar, but not too much otherwise it will turn out like a sweet BBQ style.
I like the heat from the chipotles, of you are sensitive to heat, just leave them out!

To Start

Soak the Ancho chile's for 20 minutes in some boiling hot water. Clean by removing the stem and and seeds then coarsely chop. Toss into the food processor the carrots, onions, garlic, tomato paste, chipotle. Quickly pulse 5 or 6 times until you come up with a thick paste.

You may have to add some water to the mix to homogenize. .

Cost the ribs with salt and pepper. Take your dutch oven and put on the stove, crank up the heat and some oil and brown the ribs. Remove and save.

Fry the bacon in the pan you browned the ribs. When the bacon has rendered most of it's fat put in the seasoning paste you just made.

Cook for about 5 minutes then add the rest of the water, cumin, molassess or piloncillo ,salt and pepper.


Now add the seared ribs, Cover and stick into a preheated oven at 325 for about 5 hours..

Remove from heat, let cool on the counter until it is cool enough to put into fridge so that the fat will solidify on top for easy removal. They are better the next day anyway. If you must, go ahead and skim the fat off the top and use the same day.

I usually service this on some exotic rice like jasmine or basmati.


Stuff you will need:

3-4 medium dried ancho chiles
1 large onion chopped
2 carrots chopped
5 garlic cloves chopped
2 tablespoons of chipotles en adobo plus 1 tablespoon of adobo sauce
2 tablespoons tomato paste
2 tablespoons molasses or one piloncillo crushed
1 teaspoon cumin seeds
2 cups of water
2 slices of bacon chopped
1 cinnamon stick
6 pounds of short ribs

Wednesday, June 10, 2009

Sopa De Platano


My wife's staple is Plantain, so this is a soup I made that even I enjoy now and then. As all soups it is pretty easy to make, and after the first serving, you can add stuff to it and have it transform itself into a totally new taste, until you finally run out of it!

Heat your pot, drop in the olive oil and sweat the onions, carrots , celery and garlic until they become a little soft.
Add the chicken stock, the plantain , cumin and your mandatory bay leaf.
Bring to a boil, turn down to a simmer, and let it go for about an hour or until the plaintains are soft.
Remove from heat, let it cool down a little, if you have an immersion blender, you do have an immersion blender don't you?
They are much better and faster than a blender, less to clean and make a great noise while you swirl away inside the pot. OR you can use it as a light saber if there are any kids around.....
Remove the bay leaf, and puree to your desired consistency. Touch up with salt and pepper to your taste and serve with some of the chopped cilantro. If you use a really expensive serving bowls and zigzag some diluted sour cream or creama it will take a whole bunch better........guaranteed!

Stuff you will need:

2 Large Plantains or Platanos machos peeled and cut into 1/2 rounds.
1 TBS olive oil (without Popeye) Anyone younger than 50 will not get that!
1 large carrot , chopped into 1/4 inch dice
1 small yellow onion, chopped fine
1 cup of chopped celery
5 cups of home made chicken stock, remember the lesson a few weeks ago?
1 handful of fresh cilantro chopped fine, try and remove the thicker stems
1 Bay Leaf (remove the Bay leaf just before you blend the whole shebang)
1 tbs cumin
Salt and Pepper

Monday, June 8, 2009

So you want to build a garden box, eh?


Ok you asked for it!

The good thing about raised beds is that even if you have lousey soil, or no soil in some cases like a concrete yard... this will make gardening easy. Especially for old folks who don't want to be on their knees or bed over a lot. I built this box a little higher than you really need so that I would be able to reach all over the place with it. Once you fill it with soil mix, it will provide the excellent drainage needed to grow picture pperfect vegetables and flowers most of the year!

You can build the basic raised bed in a few hours, then add versatility by mounting PVC pipes inside to hold hoops that elevate bird netting, or in colder weather plain old plastic to either start the seedlings early or just cover the crops for better production, sort of like a mini greenhouse.

For best results orient your bed north-south for maximum sun exposure.

It is preferable to use redwood or cedar ― both are beautiful and rot-resistant. But here in Mexico, most likely you can only get Pine, there are some regional woods that also are rot-resitant,so ask your local lumber monger.

You’ll need a table or power saw to cut the wood; after cutting, paint the wood on all sides with an oil-based sealer or stain or left over deck sealer, almost anything will work. I would not use house paint since you don't know what stuff is in that. I chose to paint it a redwood color stain.

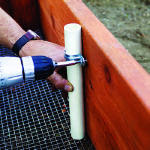
The first box I built was only 12 inches high, as shown on the photos. the 2nd one I

doubled it, to be 24 inch high. I personally like the bigger box because I do not have to lean over or ben

d over as much. The downside is that you will use twice as much wood, screws, and soil mix. You can start with the shallow box first and see how you like it, then change it. The construction is simple and you can adjust the size to fit your particular space and requirements.

Have fun!

An electric drill is helpful, though not required.

Stuff you will need:


One 6-foot-long 4-by-4
6, 8 foot long 2x6's
1 10ft long 1 inch PVC water pipe
2 10ft long 1/2 ich PVC pipes
1/2 gallon semitransparent exterioir oil stain
32 3 1/2 inch #14 wood screws
16 1/2 inch #8 wood screws
1 roll of 1/4 inch mesh hardware cloth. total of 4x10ft
If you are putting this on top of concrete you do not need the hardware cloth
I used it because I didn't want mole, gophers, rats and other things digging into
the box.
8 1 inch conduit straps
32 cubic feet of soil or mix.


Here you can see one of my boxes with Beets, Carrots, Snow peas and strawberries.

Saturday, June 6, 2009

Carrots Vichy.


I like carrots, and they like me. Here is a picture of some of my crop, the skinny ones are the ones that I have to pull so that the big ones will have room to grow up nice and big , strong and tasty!

This variety are called, Nantes.

Here is a simple recipe. This was one of my most popular items on my catering menu. It is also one that you should learn since it's easy. I usually love to make for formal dinners.

I would suggest that you cut the carrots on the bias, it looks a lot better than just chopped in rounds.
To prep, take the carrots , wash and peel, cut on the bias in about 1/8 inch thickness.
Place the carrots in a 12 inch skillet or saucepan, cover with Vichy or soda water, toss in the salt, cook until tender usually about 5 to 10 minutes depending on the freshness of the carrots.
Drain,
Toss in the butter, toss the carrots over medium heat until all the butter is melted and the carrots are heated through. Then add the sugar, toss, salt and pepper to taste, top with chopped wide leaf parsley...serve.
See I told you it was easy!

Stuff you will need:

About 5 cups yield of carrots peeled and sliced 1/8 thick
Vichy or Soda water
1/2 tsp Kosher Salt
1/4cup butter
2 TBS sugar
1 TBS chopped parsley.


That's it!


Thursday, May 28, 2009

Pear Tart on a tortilla


This is a really simple desert which you use a premade flour tortilla, kind of like cheating, eh?
Preheat your oven to 400 F. Lightly spray tortilla with cooking spray and place the sprayed side down on a baking sheet.
Meanwhile back at the counter peel, core and slice into lots of thin slices or just even slices so that they are all the same size so they cook evenly. You should be able to use one pear if it is a large one otherwise it may be two small ones.
(Apples will also work on this)

Take some butter and cut into thin pats and place over the top spacing evenly as possible.
Take some cinnamon sugar and sprinkle on the top.
Place into your hot oven and cook for about 15 mintues until you see the sugar bubbling and carmelized.
To make the glaze, take some jam and put it in a small dish, add the water and zap in the microwave to heat up, stir while doing it a couple of times. Remove and use to glaze the top of the pie.
To cut, use a long Chef's knife in one down motion otherwise you will tear the pieces. Serve warm with a scoop of your favorite ice cream.

Stuff you will need.

1 or 2 Pears.
2 TBS sugar
2 TBS butter into small pieces
2 TBS jam, Apricot or Orange


Keep in mind that it is not the best looking piece of dessert, since it is fast and quick. You could make it so all the pieces are perfectly cut, using a mandolin slicer. Or you can hire a food stylist to put it together for you. Then it will look like this photo.........
I never said I was a neat cook......

Wednesday, May 27, 2009

Basic Chicken Stock! Don't throw those bones out!

Chicken stock is probably the main stock that you can use since you always seem to have chicken laying around with bones left over and is pretty easy to make.

What I usually do is toss the pieces that you do not use, pieces like the feet, chicken wing ends, neck, back and any other pieces or bones that you do not use. Once you get a bag full it's time to make stock!

Cut the onion into quarters, wash the celery and wash the carrots and cut into 3/4 inch pieces. Place the bones, and vegis into a stock pot add salt and cover with water. Bring to a boil, once boiling reduce heat to simmer, cover and let it simmer for a hour or two.

Take a slotted spoon or mesh strainer and either remove all the boiled items or just strain the liquid into another pot or bowl.
Discard all the used up stuff.

You now have chicken stock.
Now if you want to make it clear, which is the mark of a serious cook, you first let it cool in the fridge overnight. Once the fat has solidified on the top, remove with spoon. You could use the fat for cooking if you like, or just toss it.

Next heat up the stock and strain through a cheesecloth lines strainer, if you are satisfied with the clarity your'e done.
If not, then separqate an egg and reserve the egg white ( use the yolk for some flan or scrambled eggs) mix cold water , the egg white and crush the egg shell into small pieces, add that to the liquid egg mix. Add the mix to the stock.

Bring the stock to a boil, remove from the heat and let it stand cooling off for about 10 minutes.
Strain again through a stainer lines with cheesecloth.

Your stock that is left should be very clear.

Use the stock for soups, one thing I do is freeze it either into small zip lock bags, flat in the freezer and the later use for soups and sauces. Some people will fill ice cube trays and then when frozen put them in zip lock bags.

Stuff you will need.

1 to 2 lbs of chicken parts
one large white onion
2 to 3 stalks of clery with leaves
1 Large carrot
2 teaspoons Kosher salt
6 to 8 cups of water
1 egg with 1/4 cup of cold water

You can also make a super stock from your left over turkey after Thanksgiving!

Monday, May 25, 2009

Basic Stocks, from whence the soup is born.....


Stocks are necessary for Good Taste

Stocks provide the foundation for a variety of dishes. They are very versatile and depending on how you make them they can be used in an infinite number of applications and recipes.
You have to use stocks as the building block to add more flavors for soups, sauces, and braises. Stocks are also used in poaching or steaming, a flavorful alternative to water in rice and polenta, and sometimes a substitute for oil in some pestos and vinaigrettes.

Stocks are made by cooking meat, poultry or fish bones, vegetables, herbs, and other aromatics in plain water for a real long time. When you finish you have a very flavorful and complex liquid. While the ingredients that go into a stocks may vary, the techniques used to make stocks and the mix of ingredients are basically the same.

It is extremely important not to allow stocks to boil as they cook.

This often causes impurities and fat to be dispersed in the liquid.

The fat is extremely difficult to remove after the stock is finished. And adds a lot of time to first chill the stock, remove the fat and then heat it up again to use it.
Instead, a stock should be simmered over a medium to low heat and every so often you should skim the top to remove anything that is floating on the top of the liquid.
The most popular stocks Light White, Rich Brown and Vegetable Stocks.

Light White Stocks

White stocks are made from bones that are blanched before they are combined with other ingredients. Blanching allows the impurities, which makes a stock cloudy, to be leached out before the bones are used. Usually only pale colored vegetables are used so no dark colors get into the stock (No beets here!)

Rich Brown Stocks

Brown stocks are like white stocks, but the bones and vegetables are roasted before they are put in the water and aromatics. Usually brown stocks have some tomato product and better brown stock has a rich and deep color and flavor.
Most of the time the stock making process is a long several day affair, with you removing the pot cooling it down completely, removing the fat which solidifies on the top, putting the pot back on the heat to reduce down and enhance the flavor even more.
The end product is usually a gloppy gelatinous syrupy mix, especially when cold, and has a potent concentration of flavors so that when you add a spoon or two to a soup , or sauce you can tell of it's lengthy beginnings! The Glop is called a Glace.
Glaces are often used as a sauce themselves or sometimes with a some other ingredients added to balance it out forming an nice rich sauce.

Hearty Vegetable Stocks

Vegetable stocks are often made from left over end pieces, peelings, and scraps from any combination of vegetables used in the kitchen. One thing a serious cook does is never toss out any trims, cuttings, tops, peelings of any vegetables. The simply was is to have a bin that after your cooking session ends, you take the trims, place them in a zip lock bag and freeze them. When you are read to make a vegetable stock you have oodles of stuff to which you fill the pot with. The only thing to be careful about is that you have a good balance of flavors, and not overwhelmed by one thing or another. A good vegetable stock has a little of everything not just 10 lbs of potato skins.....
The normal mix you should look for is onion, carrots, greens of some sort and some basic root vegetable. Do not use seeds as they impart sometime strange flavors.


Next Chapter, some basic stock recipes........

Saturday, May 16, 2009

Frijoles charros, Cowboy Bean Soup


I enjoy making soups because they are so easy to make and taste so good. They are also a good way to use up left overs, like chicken, meat cuts, left over steak or hamburger just lots of stuff! Most all soup start out the same, chopped onion then stock then the flavor and that's it. This soup is pretty basic, feel free to add your personal spice touch.

In a large stock pot toss the cut bacon on high heat and cook the bacon until crisp.

Reduce heat and add the onion and garlic and cook until the onion is soft ( about 5 minutes)

Add the uncooked beans and water, bring to a boil, reduce heat to simmer and cover.

Go do something for about 2 to, 2 1/2 hours.

Add the chilies, salt, and tomatoes. Increase the flame a little and continue cooking until the beans are fully cooked and tender, about another 30 minutes.

Check the seasoning and serve.

I usually will add a dollop of cream to the top and dig in.


Stuff you will need:

4 or 5 slices smoky bacon cut into 5 or 6 pieces per slice
3 cloves garlic, sliced into fine pieces
1 large onion, chopped fine
3 cups dry pinto beans , washed and checked for small pebbles etc
3 mild chilies like poblano, (fresh) or Ancho (dried) cut into 1/4 inch strips.
3 tomatoes, peeled and diced. ( if not peeled, not a big deal )
1 teaspoon salt.
8 cups water or chicken stock.


Chile info....
If you are using a fresh chile then roast it, on the flame until the outside skin chars, then put into a plastic bag for 15 minutes to steam. Remove from bag and under a running steam of water, peel the charred skin off. Remove seeds, remove stem and cut into pieces.

If hydrating a dried Ancho chile, put into hot water to cover and let sit for 30 minutes, then cut and use. Also remove seeds etc.

Wednesday, May 13, 2009

Red Pepper Chicken


My wife is picky when it comes to chicken dishes, she only likes it Rostisado or Beer Can chicken or a dish that the chicken doesn't taste like chicken....
This is one, and it is a tad more complex then just throwing a chicken on the grill, it takes a few extra steps but taste good. Total time about 40 minutes more or less. Less if you have do your advance prep.

Take the chicken and cut the breast into 1 by 3 or 4 inch strips, dust with seasoned flour, saute until brown on all sides, remove and tent with foil to keep warm.
Add a little more oil or butter, dump in the onions, mushrooms and peppers. let cook until the mushrooms have reduced. Add the sausage, in pieces after removing the casing.
Add the wine and chicken stock.
Reduce until the sauce develops ( or add corn starch)
Return the chicken to warm up, for about 3 to 4 minutes.
Serve on rice or Orzo, or with wide egg noodles.

That's it, not too bad.


Stuff you will need:
One whole chicken breast with bones removed. Remove skin also.
3 chopped shallots
1 Red Bell Pepper or your favorite chili pepper, roasted and skin remove, seeds remove cut into ribbons.
half pound mushrooms
Italian sausage or chorizo, as an optional flavor

Sunday, April 26, 2009

Pork Chops , Grilled, real moist and juicy!.

You brine the pork chops in a brineing solution ........


If you enjoy dried out tasteless pork chops then go ahead and hit the return button, however if you like moist pork chops that are flavor full and moist, here is a recipe that is easy and works every time.

You have probably read my other recipes which use brineing. I always brine chicken, turkey and any meat that you have to cook a little longer and still require juiciness.

Now I know, you are going to tell me that you have to cook all pork to well done......if that is the case there is nothing that I will be able to tell you to convince you otherwise.

These chops you pull off the grill when the internal temperature is 120.
Yes, 120........but you are saying that 120 in beef is rare...........really rare.............

Will you give me a chance?

You pull it off the grill at 120 , tent it with aluminum foil and the internal residual heat will continue cooking it to about 135.

When you cut into it, there will not be any raw or real pink places unless YOU did something wrong. And if you are that sensitive, toss it on the grill for another 2 minutes..no more!

To make the brine, heat some water to real warm, put in the salt and sugar, with liquid smoke, Stir to dissolve and put in the chops and let them swim around for at least 2 or 3 hours. If the chops are cold you don't have to put it in the fridge. If they are not or it is real hot in the room you can put them in the fridge, remember to remove them 30 mintes before grills so they get to room temp for more even cooking.

Heat your grill to normal cooking temperature on one side and low on the other side. After brineing, remove from the brine and quickly rinse off the brine, and pat dry with paper towels.
Season with fresh ground pepper and anything else you may like at this time. (garlic powder, bbq seasoning etc)

When the grill is ready put on the grill, then for those fantastic grill marks turn the chops 90 degrees after about 2 minutes, then after about 4 minutes turn to the other side, and repeat for the grill marks about 2 minutes later.

Then put into the lower part of the grill and tent with foil, for about 2 or 3 minutes.

Now grab your instant read thermometer and jab it into the middle through the side half way between front and back and read the temperature.
It should be very close to 120, when the chops are at 120 turn the grill off and tent it with foil for a few minutes while you are preparing your plates for service.

That's it.

Stuff you will need:

3 or 4 pork chops 1/2 to 3/4 inch thickness
1/2 cup brown sugar packed
1/2 cup Kosher salt if using regular salt reduce by 33%
2 quarts water.
salt and pepper.

Sunday, April 12, 2009

Easy Low Cal Dessert

We are going over to some friends house this afternoon for Easter Dinner, and I volunteered to bring a dessert.
Knowing that there are nice pears available , and some of the people are watching their caloric intake, I needed a low cal offering

You might see a trend here now some times, sometimes not, but in the last couple of weeks it has been on "EASY". I get into ups and downs into the amount of time I want to spend making something, maybe the weather , maybe the season, maybe the appetite, maybe the lack of specialized ingredients.....eh who knows?

This will take about 45 minutes to make but it looks great and better yet tastes great.

It is simple, basic, and easy.
Braised Pears..........
Sort of Poached Pears,
Anyway they are pears that you let swim in shallow waters for about 30 to 40 minutes until ready, let cool, then serve either cool or at room temperature.

First of all you need some firm pears. You need firm ones because if they are real ripe or starting to get mushy after 30 minutes of a bath, they WILL become mushy..........mushy pears not a good thing, unless you are 95 years old and lost all your teeth.......not there yet, myself!

Wash the pears, and remove the center cores. You probably have a pear or apple de-coring device. It's the one that is waaay back in the junk drawer, sort of looking half way between a peeler and a device to remove cheery pits......
If you don't have one you can make one from a short piece of 3/4 inch copper water pipe, or just spend the 2 bucks and buy one. Who knows you may like the recipe and will want to make it again!

So, peal the pears with a vegetable peeler, be careful not to remove more than you need, then remove about 1/4 inch of the bottom of the pear so it will sit vertically in a pan without falling over etc, and then plunge the corer into the middle, twist and remove the core.
If you mad one out of a 8 inch piece of pipe you will need to ram a handle of a wooden spoon to remove the core from inside the pipe.


Yes you could use a 9/16 wooden electric drill bit and drill it out, but it becomes messy because of the speed of the drill and it flinging the pear parts all over. I have seen this done before and it is doable but the clean up takes 5 minutes.......

Now that you have all the pears, cored , sitting flatly on their flat bottoms, you are ready to make the bath water ( so to speak).
Take two to three cups of red wine, any will do, preferably something left over from a few bottles something that you will not use anymore, and toss that into a skillet.
Turn on medium heat and toss in 1 CUP of sugar, white or brown is fine.
One the sugar is combined with the wine and bubbling, place the pears into the bath, and start covering the pears with the bath juice. Do this once every 3 to 4 minutes .
You will notice that the liquid will start to thicken and become more and more like syrup.
Thant's the plan........
After about 25 minutes the syrup will start to be about right, and the pears should have taken on a nice garnet color.
Keep basting the pears.
Test one to see if it is become soft, by sticking in a small knife somewhere in the lower section, if soft then turn off the heat, let cool and that's it!

TO serve,
Place one pear onto a small dish or dessert glass, use the thick syrup to drizzle over, since it has cooled the syrup should be very syrupy.......
If you want toss some chopped nuts over it, or just add a little chopped mint........
Nice dessert, no butter, no flour, no fat just a little calories from the sugar, but very little.
Lots of nice taste........

Stuff you will need:

4 to 6 pears depending on # required.

2-3 cups of red wine
1 CUP of sugar

* you could add a dash of the following spices if you like for complexity.


Cinnamon
cloves
all spice
black pepper
Powered By Blogger

My Blog List